Quality Control of Assembled Contigs
Failed Sequences
The easiest way to start the process of quality checking sequences is by marking which have failed.
Traces that were not assembled due to low quality through the Geneious De Novo Assembler are considered fails.
Assembled contigs that have less than 75% High Quality base calls (Geneious Prime field “% HQ”) are also potential fails. As per the Barcode Data Standard, contigs need to be 75% or over to be considered a high quality barcode sequence. However, the user may want to pursue further quality control on contigs under 75% and not consider them failed based on importance of the sample.
Traces and assembled contigs that are considered fails need to be noted in Geneious Prime. Based on user preference, notation can consist of:
Color coding fails (right click on highlighted sequence files and choose “Set Document Color”), and/or
Dragging and dropping all fails into a unique folder within the local project Geneious Prime directory.
The “Mark as Fail in LIMS…” Biocode Plugin tool should be used on failed sequences. See the Reaction Status in LIMS instructions.
Manually Editing Contigs
Continue the quality control process with the remaining assembled contigs.
Click into each assembled contig individually and scan through to assess whether or not each disagreement or ambiguity (if present) needs a manual edit.
A manual edit ONLY needs to made if the user believes the consensus sequences has been called incorrectly based on the chromatogram peaks, or there is an unnecessary gap or base insertion that needs to be deleted.
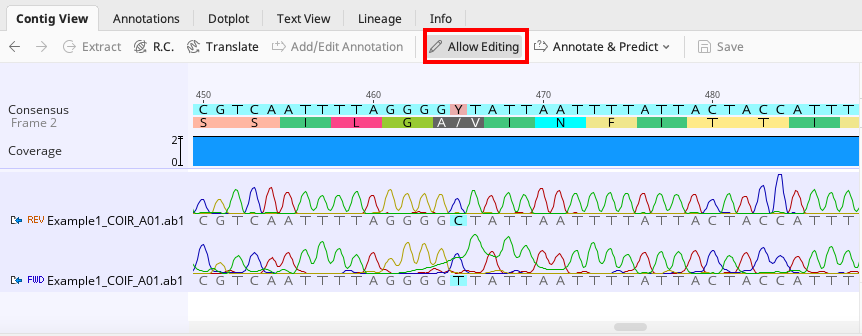
Example of an incorrectly called base that can be corrected to avoid an ambiguity in the consensus
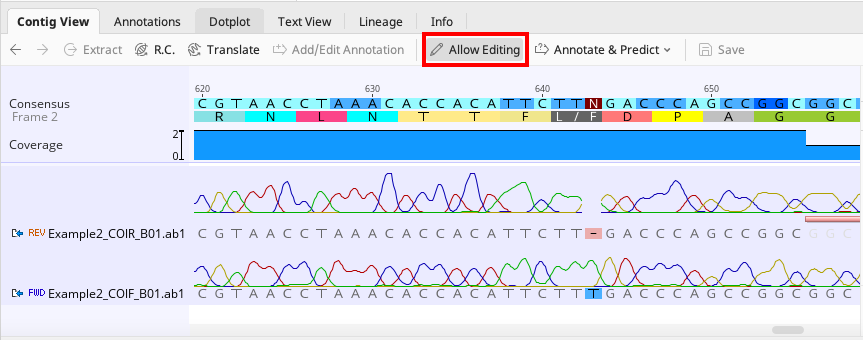
Example of a base deletion that can be corrected to avoid an ambiguity in the consensus
Sometimes it is not apparent that an edit is necessary for a protein coding sequence until the sequence has been translated (see below section).
If Geneious Prime calls the consensus sequence correctly, NO changes should be made to base calls in individual traces within the contig.
To manually edit an contig, click the “Allow Editing” button in the toolbar of the “Contig View” tab (seen in above images) and proceed with the edit.
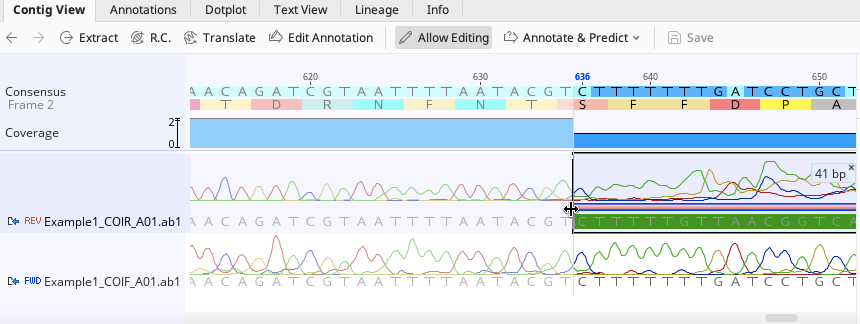
Trimmed portions of traces can also be further edited manually by clicking on and dragging the pink bar indicating the trim annotation.
Do not forget to save all edits. This will be automatically prompted when clicking outside of the assembled contig document. Alternatively, click “Save” in the upper right corner of the “Contig View” tab toolbar.
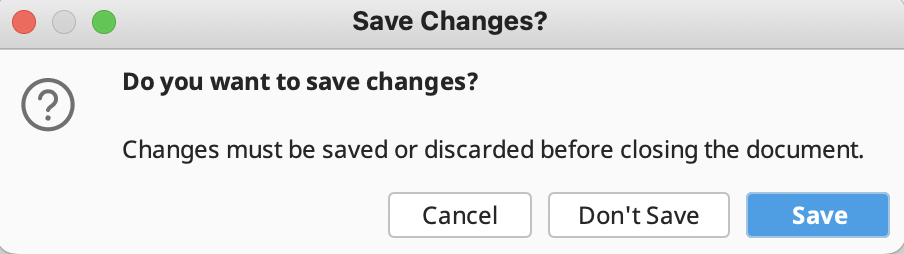
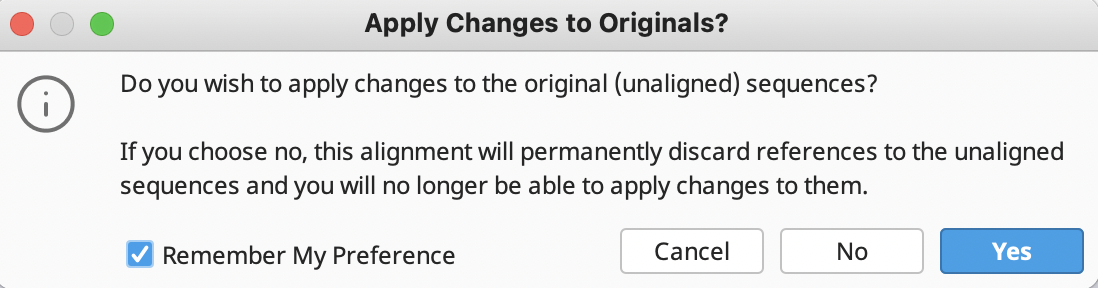
In addition, another window will prompt the application of changes the original sequences. ALWAYS Click “Yes” to avoid losing connection to reference sequences.
Genetic Code for Protein Coding Sequences
When looking at individual contigs, check the “Translation” option in the right hand menu of the Display tab on the Geneious Prime Options Panel.
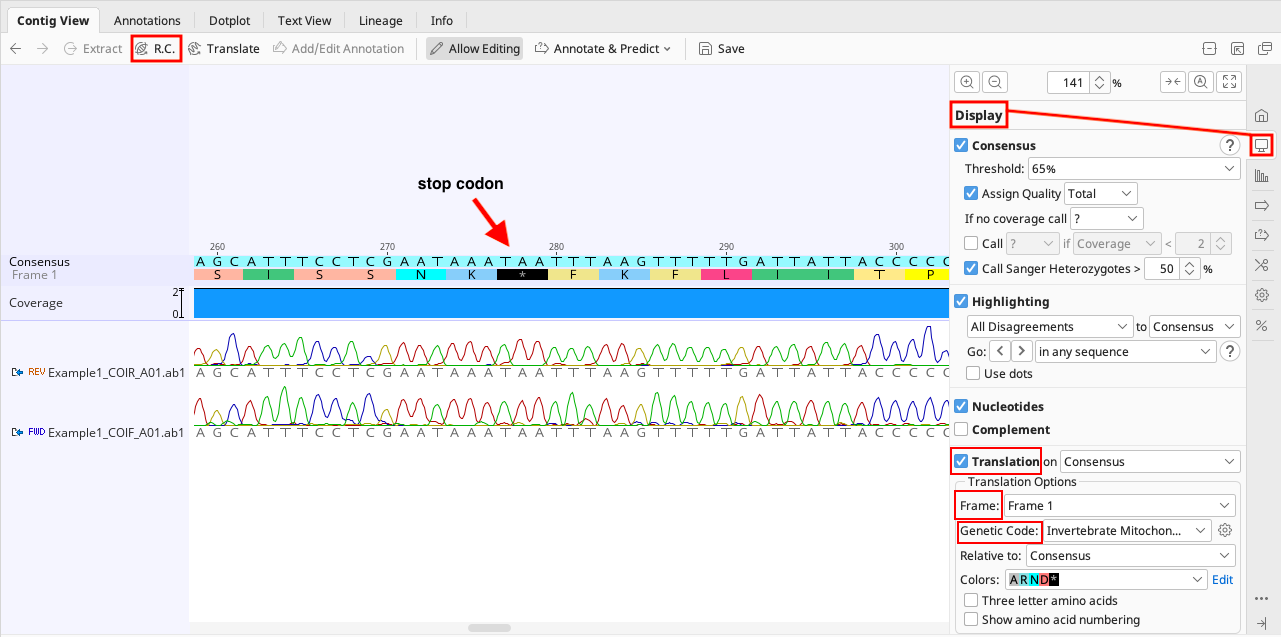
Set the correct genetic code. This is typically “Vertebrate Mitochondrial” or “Invertebrate Mitochondrial” for COI, or “Bacterial” for rbcL and matK. For further information on NCBI genetic codes for a particular taxonomic group, see their webpage.
Select the correct reading frame. Black asterisks in the protein translation represent stop codons, and cannot be part of the open reading frame of a protein coding sequence (GenBank will not accept these). If stop codons are present double-check the following:
The correct genetic code and/or reading frame is selected,
The contig is in the correct orientation (Use “R.C.” button in top left of the Contig View tab noted in the above image to reverse complement the sequence and see if that helps),
Whether insertions or deletions are present in the sequence that need to be edited, and/or
Check BLAST to verify it is not a contaminant (see below for instruction).
After checking the above, persistant stop codons may be indicative of a pseudogene if the traces are high quality. Pseudogenes should still be submitted to GenBank, as they are valueable data, but proper annotation is necessary (see the Annotating Sequences for GenBank Submission instructions).
Checking Sequence Quality with Alignments
After needed edits have been made to individual contigs, further quality control can be performed in Geneious Prime through alignments of consensus sequences.
Only align sequences that represent the same marker, i.e. align COI sequences together, rbcL together, etc. It may also be necessary to do multiple alignments of a single marker dataset based on taxonomy if the organisms are phylogenetically distant.
To produce an alignment from assembled contigs:
Highlight all assembled contigs that are to be aligned.
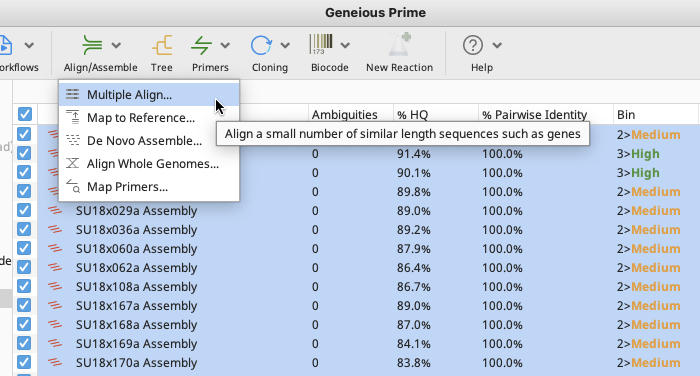
Select “Multiple Align” from the “Align/Assemble” option in the Geneious Prime Toolbar.
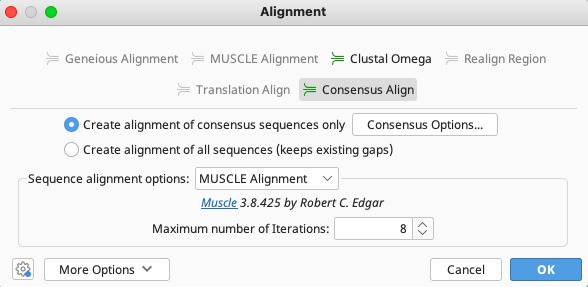
An Alignment window will appear. Select “Consensus Align” in the top portion of the window followed by “Create alignment of consensus sequences only”.
From the “Sequence alignment options” dropdown, select “Muscle Alignment”.
All other options may be left as default.
Click “OK” in the lower right corner and the Consensus Align function will run.
The alignment file will be located in the same local directory as the contigs.
Analyzing the sequences’ alignment will inform the user of any further end trimming needed if the Geneious Prime Assembler neglected to remove primers. If this is the case, the assembled contig in need of trimming will have a consensus sequence longer than others at either the 3’ or 5’ ends of the alignment. See the below image for an example of this.
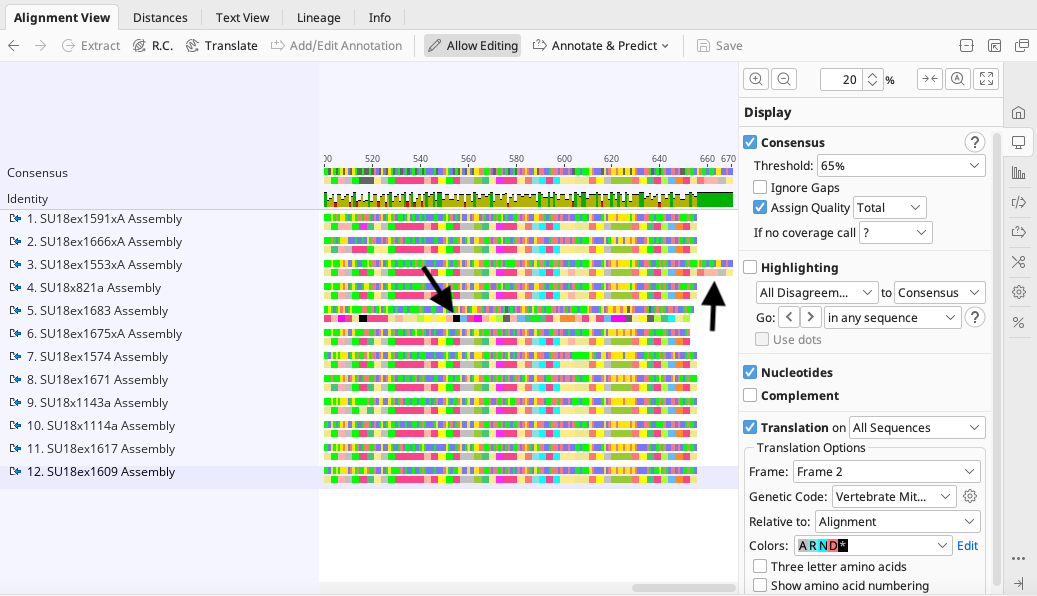
A sequence alignment is also a more efficient way to ensure that there are no stop codons in protein coding sequences, as the instructions in the above section can also be done with the sequence alignment document. See the above image for an example of this.
Phylogenetic Trees
Once individual contig and alignment quality checks have been completed, a quick general identification check can be performed through making a phylogenetic tree in Geneious Prime. For further details on the tree building in Geneious Prime, see their online tutorial.
To produce a phylogenetic tree:
Highlight the alignment produced in the previous section.
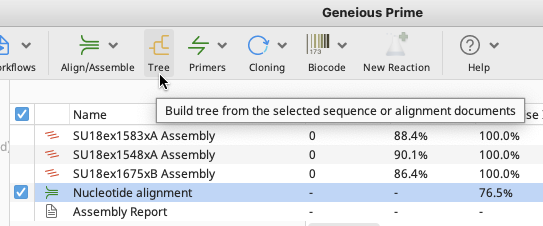
In the Geneious Prime Toolbar, select “Tree”.
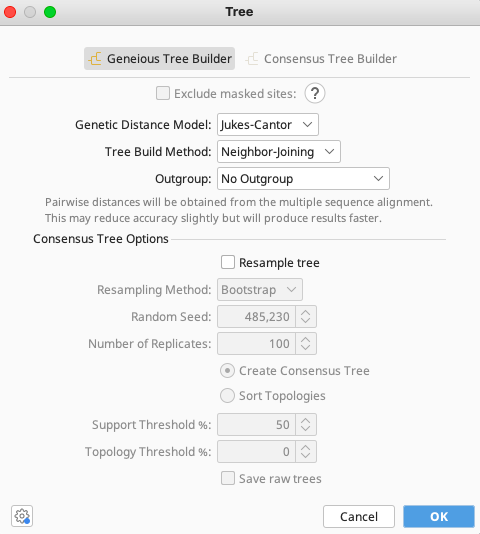
In the Tree window that appears, select options as per user preference or leave as defaults. Click “OK” in the lower right corner and the phylogenetic analysis will run.
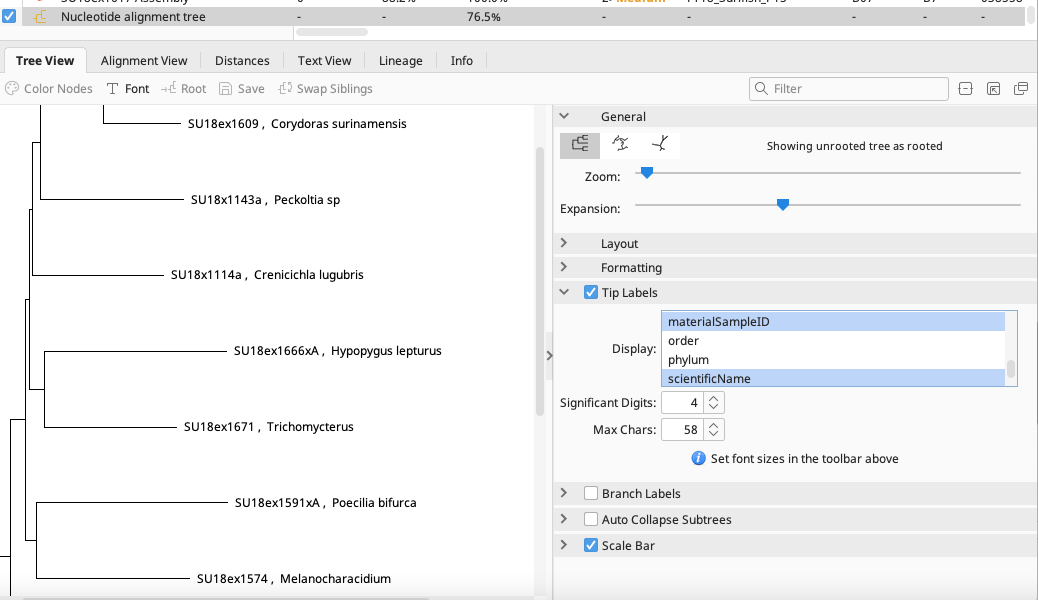
The tree file will be located in same local directory as the alignment file. The tree can be analyzed in the Document Viewer and various formatting such as Tip Labels can be altered in the Options Panel to the right.
BLAST
BLAST is a useful way to check the taxonomic ID of a questionable barcode sequence by comparing it to sequences in the NCBI nucleotide database.
To BLAST the consensus of a single contig, it is quickest to highlight and copy the consensus sequence from Geneious Prime and enter it into the online BLAST search page on the NCBI website (see http://blast.ncbi.nlm.nih.gov/Blast.cgi).
Geneious Prime also provides the ability to BLAST a single or several sequences at a time from within the program itself, but is more time consuming. It is recommended to only BLAST small batches of 15 or less sequences when using this below method. To BLAST entire sequence datasets at once, see the Running NCBI BLAST to Compare Taxonomic IDs instructions to BLAST through the Biocode Plugin or within the Smithsonian Institution High Performance Cluster (SI/HPC) “Hydra”.
To use BLAST small batches of contigs:
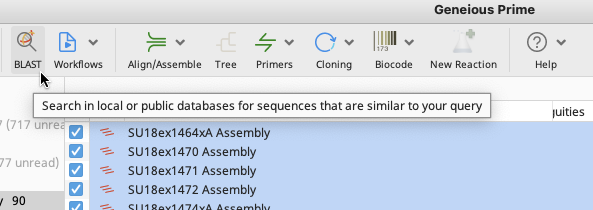
Select contigs to be compared to the NCBI public DNA sequence database and click on the “BLAST” button in the Geneious Prime Toolbar.
The BLAST window appears and has multiple options for consensus, GenBank database, program etc. The selections in the image below are defaults, however, look into the various options and decide what works best for the user’s dataset.
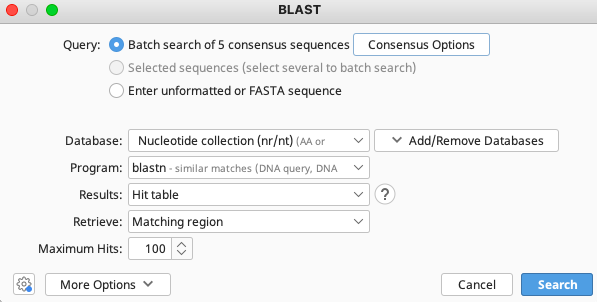
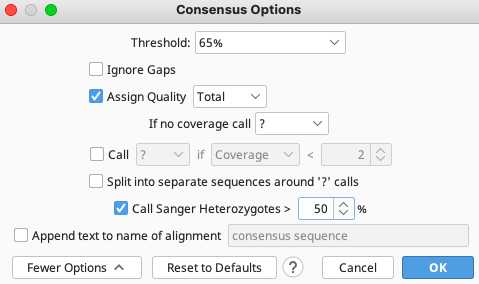
The consensus options allows the user to choose how the program will call the consensus sequence of each contig.
Once selections have been made, click “Search” button in the BLAST window.
The search progress appears in the Document Table. If this is too slow, there is a need to exit the search for whatever reason, click on the “Stop” button in the top left of the Document Table.
Once complete, the results are saved in a subfolder (folder name ends with “- (nr_nt) blastn”) within the folder containing the query sequence(s). If a batch search was done, there will be further subfolders containing BLAST results for each of the sequences.
In the results folder the BLAST results are displayed in the “Hit Table” tab. Various information is included e.g. Hit Accession number, Query coverage, % Pairwise Identity, etc. Click on the manage columns icon found in the upper right of the table to choose what is displayed. Further information is found in the other tabs of the folder (Query Centric View, Annotations, Distances, Info).
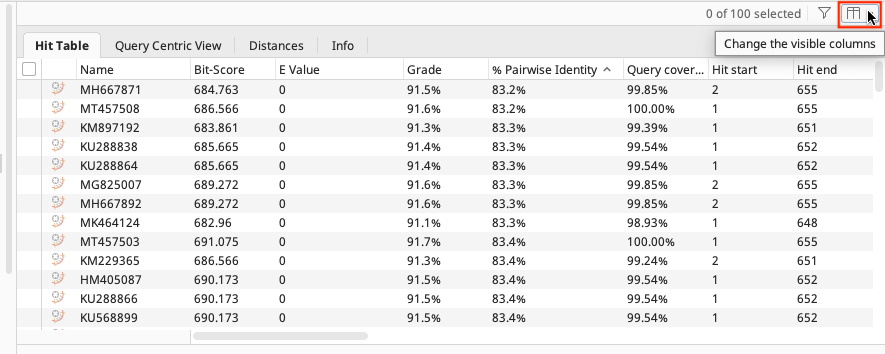
To get more information about the individual BLAST hits, select one of the hits and the information about that sequence appears in the Document Viewer. Any of the columns can be sorted, rearranged, or resized.