Tips for BOLD Upload
The following tips are aimed towards data uploads to BOLD that are destined for GenBank publication and are meant to be supplementary to instructions found in the current version of the BOLD Systems Handbook.
Creating a BOLD project
When creating a BOLD project, any markers sequenced from the samples can be added to BOLD.
However, not all markers should be pushed to GenBank from BOLD:
Markers with simple annotations (i.e. just a single coding region) can be submitted to GenBank from BOLD.
Markers that cover multiple regions, such as the psbA-trnH intergenic spacer must be submitted to GenBank through another method other than BOLD, such as the GenBank Upload Pipeline 2: Geneious Prime GenBank Submission Tool, as these sequences require more complex annotations for GenBank than BOLD can provide.
Pseudogenes must also be submitted via other methods than BOLD.
Note
To keep all sequences from a single project together, pseudogenes may be added to BOLD projects using the “-like” barcode options that are available (e.g. “rbcL-like”, “CO1-like”). Always upload pseudogene marker data separately from coding marker data.
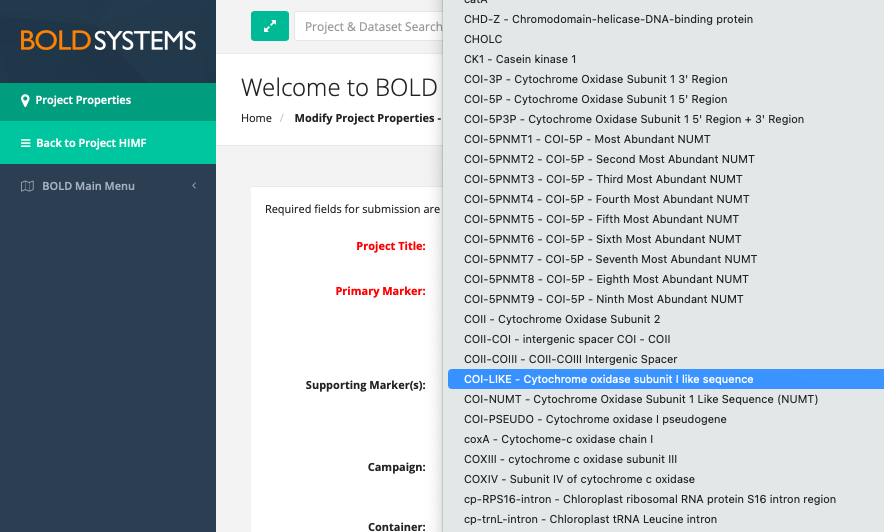
Example of a pseudogene “-like” option in the supporting marker dropdown list in BOLD.
Uploading Specimen Metadata
Populate the BOLD spreadsheet template with relevant voucher, taxonomy, and collection data from the GEOME FIMS. Alternatively, if wanting to isolate BOLD metadata upload to only samples that have passed QC in LIMS, follow the Exporting Sequence Metadata in TSV format protocol to pull relevant data from passed LIMS sequences.
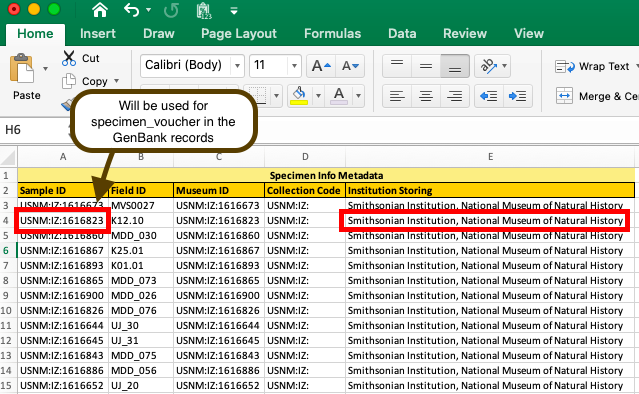
If vouchers are stored at Smithsonian, add “Smithsonian Institution National Museum of Natural History” in the “INST” field.
Be aware that whatever value is listed in the SAMPLEID field in the BOLD metadata spreadsheet will be the “specimen_voucher” in the GenBank record.
To alter SAMPLEID after initial sample data upload, email support@boldsystems.org to request the current SAMPLEID change request table.
Adding BOLD Process IDs to GEOME
Once BOLD has imported the samples, download specimen “data spreadsheets” from the BOLD project to obtain the BOLD Process IDs.
Download FIMS spreadsheet from GEOME and use the Excel “Xlookup” function to paste the BOLD Process IDs into FIMS column “boldProcessID”. Re-import the edited FIMS data to GEOME to update this information.
Uploading Sequences to BOLD
Once the BOLD Process IDs have been added to GEOME, go to Geneious Prime and follow the Annotating with FIMS/LIMS Data protocol to annotate the relevant consensus sequence documents to be uploaded to BOLD with the updated FIMS data.
Follow the Using the Batch Rename Function protocol to rename consensus sequence documents with boldProcessID from FIMS, followed by a bar “|” and whatever other fields are desired.
Export renamed consensus sequence documents from Geneious Prime as a fasta file for upload to BOLD following the Exporting Sequences in FASTA format instructions.
In BOLD, while uploading fasta files to the BOLD project, choose “Smithsonian Institution, Laboratories of Analytical Biology” as Run Site if sequences were generated at LAB.
Uploading Trace Files to BOLD
In BOLD, confirm that primers are registered in the BOLD primer database. See BOLD handbook linked at the top of this protocol for instruction if primers are not in BOLD.
In Geneious Prime, ensure that contigs from which the previously submitted consensus sequences were produced are passed in the Biocode LIMS in Geneious. Follow the Reaction Status in LIMS protocol to do so if not done already.
Prepare and export the trace files in the needed format through the “BOLD Trace Submission” function found in Geneious Prime. To do this:
Log onto the Biocode LIMS plug in (see Connecting with the Biocode Plugin).
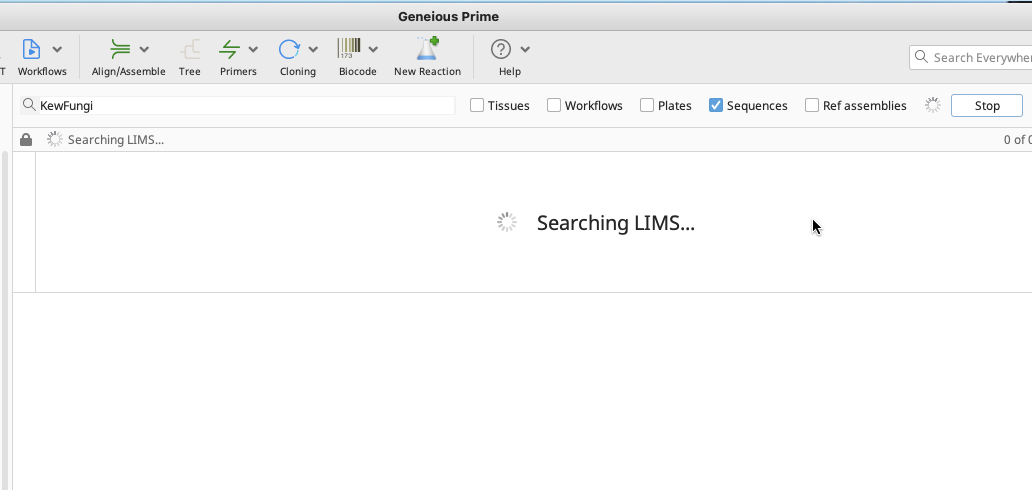
Search for passed consensus sequences in the LIMS that have already been submitted to BOLD, but still need traces submitted.
Highlight the desired passed sequences.
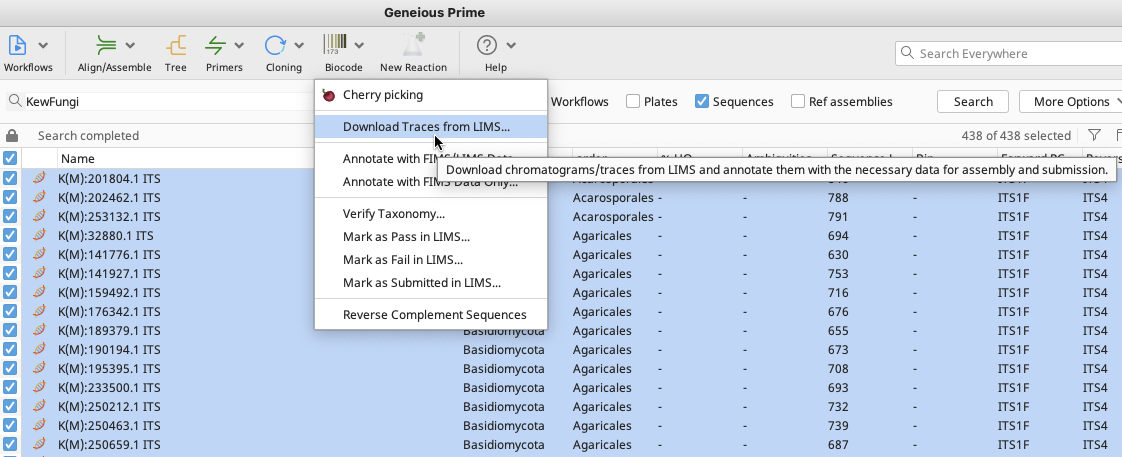
In the Biocode plugin dropdown menu, click on “Download Traces from LIMS…”.
After selecting a local Geneious folder location to place the traces, a Download Traces from LIMS window will appear.

Select “Matching selected LIMS sequences”. Click “OK” and traces will be downloaded to chosen local Geneious folder.
Follow the Annotating with FIMS/LIMS Data protocol to annotate newly downloaded local trace files to associate them with BOLD process IDs from the FIMS.
This does not need to be done if, after BOLD Process IDs were added to FIMs, contigs were annotated prior to passing them in LIMS.
Highlight traces to submit to BOLD from within the local Geneious folder.
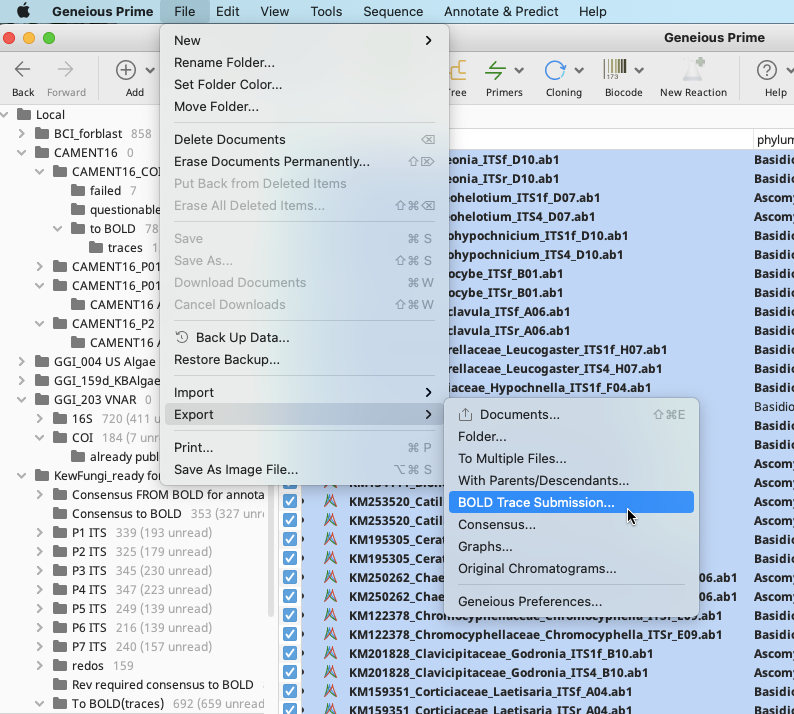
In the Geneious Prime Menu Bar, go to the File dropdown and select “Export”, then “Bold Trace Submission”. This option is not available in the Export shortcut in the Geneious Prime Toolbar.

In the BOLD Trace Submission window that appears, select the boldProcessID FIMS field from the dropdown at top of the window.
Select “Retrieve using annotated LIMS information” so Geneious will use primer information already in LIMS to export the traces.
Alternatively, enter forward and reverse PCR primer names as they appear in the BOLD database if the same pair was used universally for all traces to be submitted.
Select the local directory to which Geneious will export the traces and name the submission. Geneious will name the zipped file it produces by this name. Click “OK”.
If the “Retrieve using annotated LIMS information” option was selected, the Rename? window will appear that allows for locus and primer name changes to conform with names in the BOLD primer database, if changes are needed.
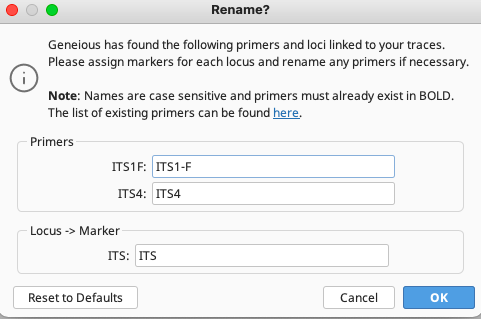
This screenshot shows a primer name change was necessary in this above instance to conform with the entry in the BOLD primer database.
Click “OK” when ready and trace files and the necessary BOLD “data” spreadsheet will be downloaded in a zipped file to the chosen local directory. This zipped file can be directly uploaded to BOLD.
After BOLD Data is Submitted to GenBank
Once all data has been submitted to GenBank, the user should watch for emails from either BOLD personnel or GenBank admin personnel.
These emails may relate to alignment errors, presence of stop codons, etc. and errors must be fixed before submission can be completed.
BOLD puts an automatic 1 year embargo on GenBank releases. Once GenBank admin emails the submitter a list of accession numbers, respond to this email and request that the 1 year embargo be removed, if desired.
Remember to report GenBank accession numbers back to SIBN staff and the collection and data managers within the relevant dept(s).