Geneious Prime Introduction
Geneious Prime Layout
Here is the layout of the Geneious Prime window.
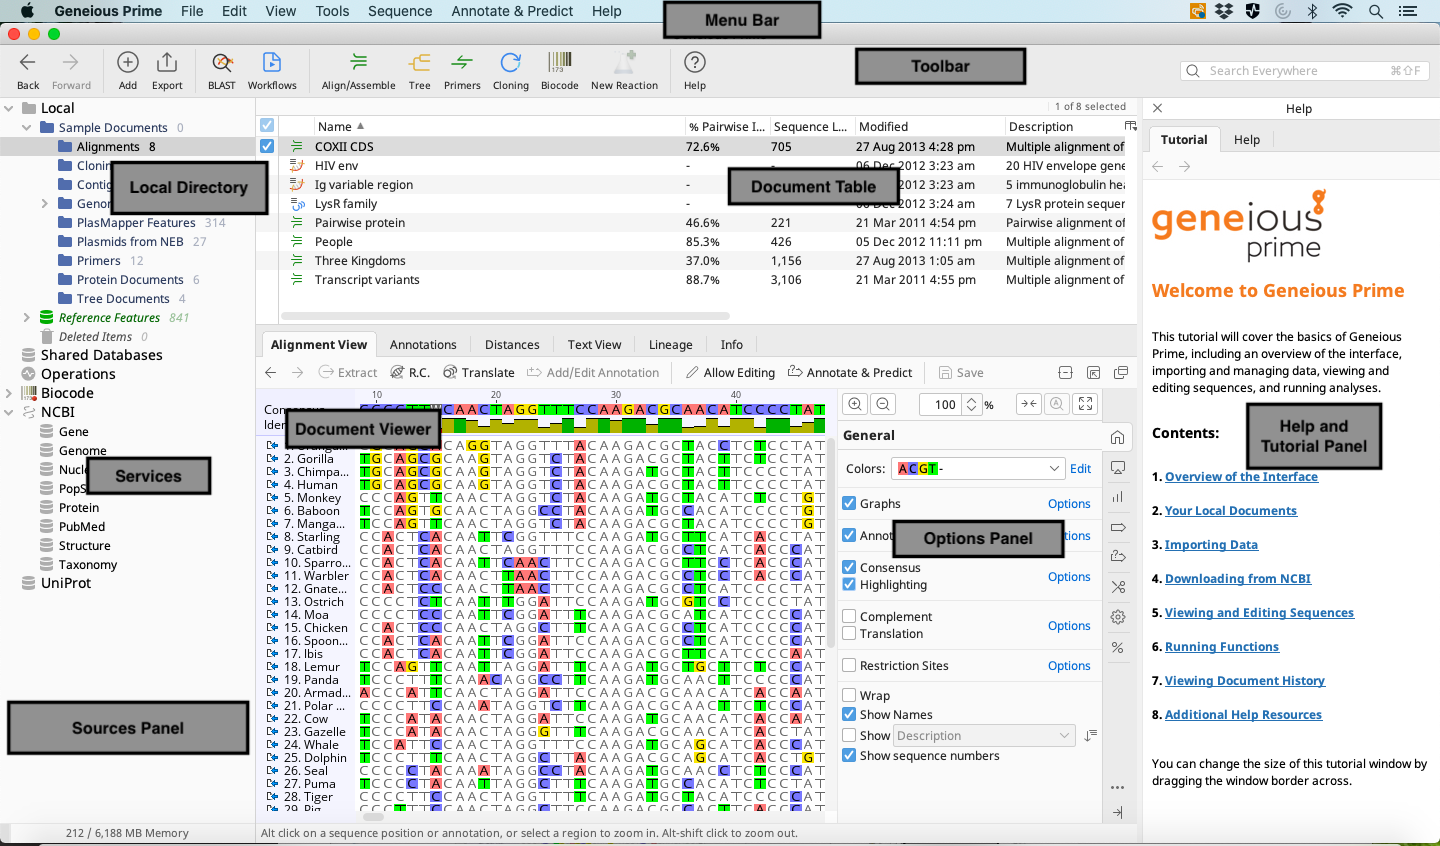
The Toolbar is found at the top of the Geneious Prime window, and contains a variety of buttons including Back, Forward, Tree, Help and so on.
The Geneious Prime window is further divided into a number of panels including the Document Table, Document Viewer, Options Panel. The size of each panel can be adjusted by clicking on the border and dragging to the desired size.
On the right-hand side is the Help and Tutorial Panel, which contains a number of tutorials and also a search for help in other topics.
On the left-hand side is the Sources Panel which includes the Local Directory and list of Services. The Local Directory is where documents such as primers, raw traces, contigs, alignments, trees etc. are permanently stored.
Geneious Prime Plugins
Plugins are downloadable modules that can add new functionality to the program.
Click on “Tools” in the Menu bar then select “Plugins” from the dropdown menu. A new window will open and the “Plugins and Features” tab contains information on the available and installed plugins.
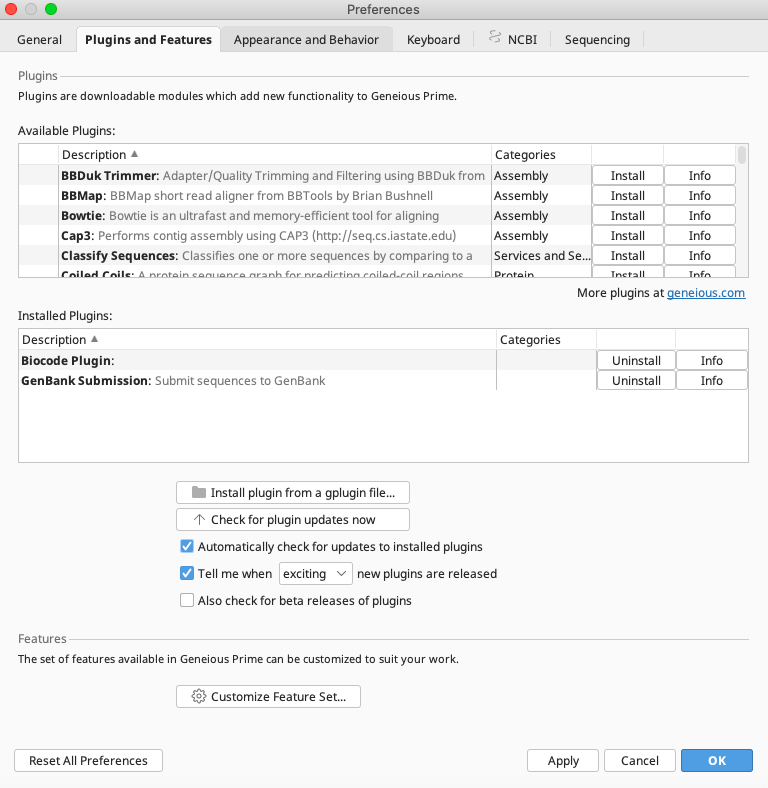
To install a plugin:
Click on the “Install” button for the relevant plugin in the available list.
Alternatively, a plugin can be downloaded from an outside source.
If this has been done, click on “Install plugin from a gplugin file…”, find the gplugin, click “Open” and “Install Plugin”.
Geneious Prime will need to be restarted once plugin installation is complete.
Within this window, plugins can also be uninstalled, checked for version information and updates etc.
Creating Primers
If a primer folder does not exist in the Local Directory, one should be made. To create a new folder in the directory, highlight the local folder in the Sources Panel. From the Toolbar, click “Add” then “New folder…” and enter the new folder name.
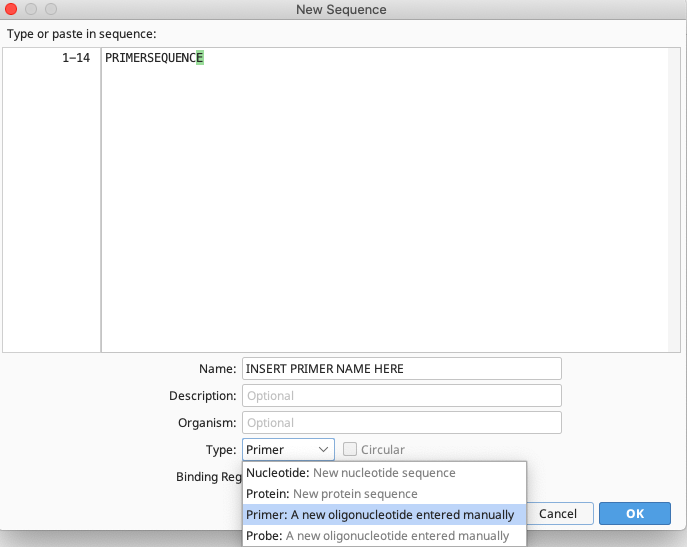
To add a new primer, highlight the destination folder, then in the Menu Bar select “Sequence” followed by “New Sequence” from the dropdown menu. A New Sequence window will open. Here, enter the primer sequence, name, and in the “Type” dropdown menu select “Primer”.
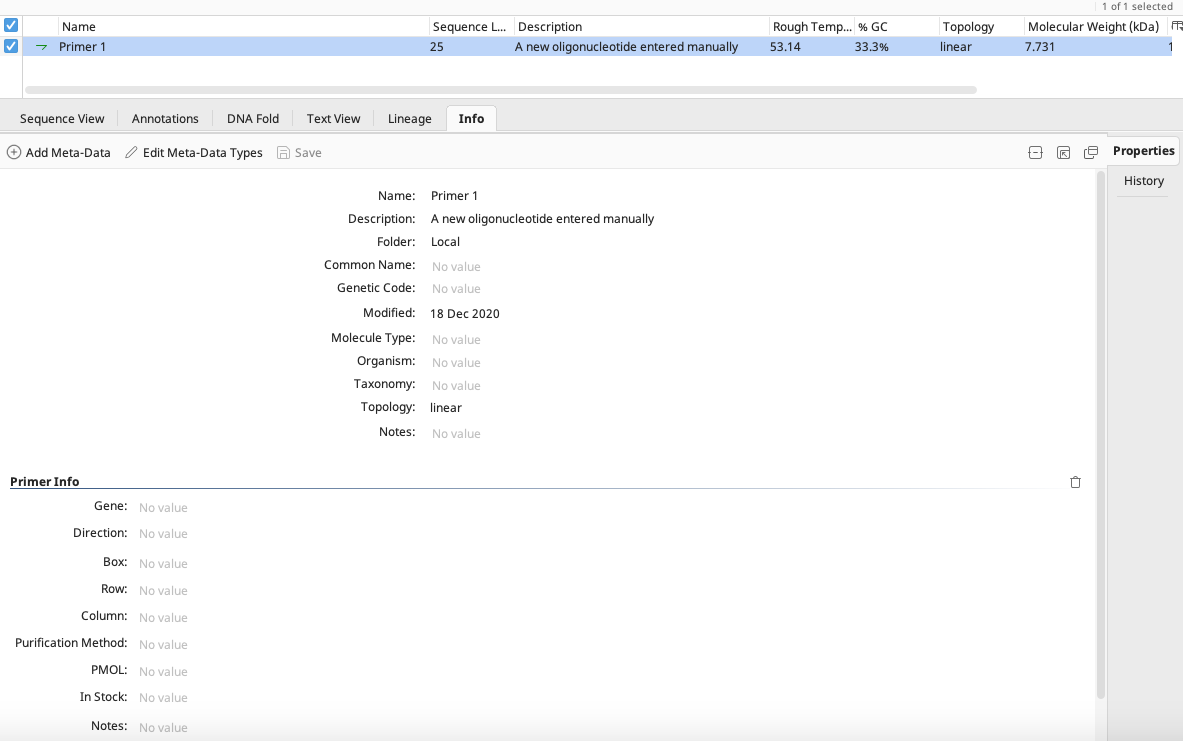
Once a primer has been created, any associated information can be edited. Highlight the primer in the Document Table, and go to the “Info” tab in the Document Viewer. Here, various metadata such as Gene, Organism, Direction etc. can be added. Fill in as much information as possible for future reference.
A very convenient tool is the ability to export and import folders of primers. To export a folder from the Local, simply select the folder and in the Toolbar click on “Export”, “Export Folder…”, choose the file destination and name, and click “Save”.
There are two options for importing a folder or file into Geneious Prime:
From within Geneious Prime, click “Add” in the Toolbar, followed by “Import Folder”. Navigate to the primer folder on the local disk and click “Open”, and the folder will be imported into Geneious Prime.
Alternatively, folders, files etc. can be dragged and dropped directly from the local disk into the destination folder in Geneious Prime.