Using the Batch Rename Function
This function is mostly used by SIBN to change the local name of documents such as assembled contigs, consensus sequences and trace files. For more information on other ways this functionality can be used, see the Geneious Prime website.
Highlight documents to be renamed.
Navigate to the Edit dropdown menu in the Geneious Prime Menu Bar.
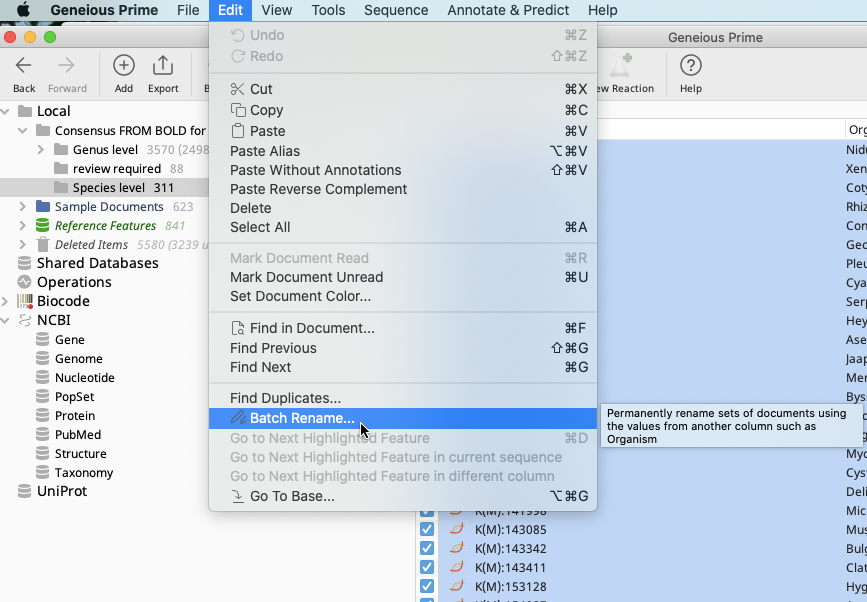
Choose “Batch Rename” and the below window will appear.
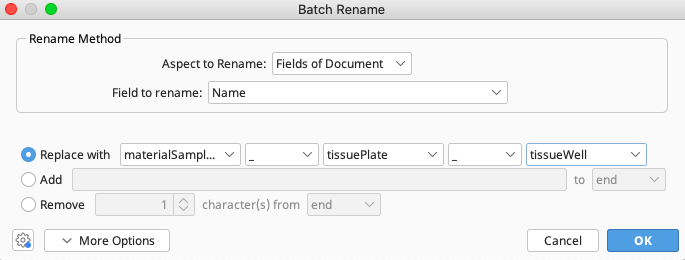
In the “Aspect to Rename” dropdown menu, select “Fields of Document”.
Note
If renaming assembled contigs or alignment documents and “Sequences in alignment” is selected here, the documents that will be changed are the trace files or sequences that make up the contig or alignment, rather than the contig or alignment itself.
In the “Field to rename” dropdown menu, select “Name”.
Below the “Rename Method” box, there are three methods listed for renaming the documents.
- Replace with
If using “Replace with” it’s possible to choose up to three different FIMS data fields from the dropdown menus such as materialSampleID, voucherCatalogNumber, tissuePlate, tissueWell. For example:
Documents often need to be named with materialSampleID, and/or tissuePlate and tissueWell fields prior to performing the Biocode Annotate with FIMS/LIMS functions.
Sequence documents need to be named with voucherCatalogNumber when downloading for import to Genbank via the NCBI Submission Portal.
- Add
There is also an option to “Add” additional text either to the start or end of the Name.
- Remove
The “Remove” option will delete a certain number of characters from the start or end, as defined by the user.
Once all relevant fields are selected, click OK and the window Confirm Batch Rename containing a subset of documents with their old and new names will appear.
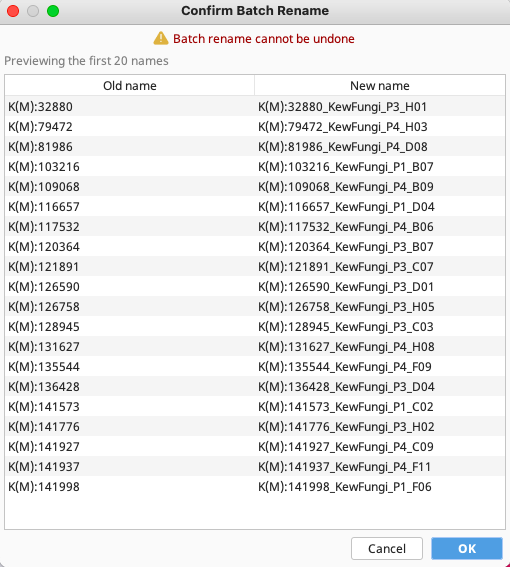
Batch Rename cannot be undone, so it is important to click OK only if the names look correct. If not, click “Cancel” and try selecting the correct fields again.
Once “OK” is clicked, the documents will be renamed.
The rename process may need to be repeated to get the desired naming convention (e.g., Use “Replace” first and then follow up with the “Add” option).