Annotating with FIMS/LIMS Data
After the QC process has begun on assembled contigs or consensus sequences locally in Geneious Prime, it is possible that updates were made to the data in the GEOME FIMS or Biocode LIMS (e.g. taxonomy changes or primer corrections). Also, for various reasons, local files in Geneious can become dissociated from the original LIMS plates or workflows. If a local file does not have a workflow ID listed in the “Workflow Name” Geneious column, it is not associated with its original LIMS plate and needs to be annotated.
In either case, local data needs to be updated with current FIMS and/or LIMS data using the “Annotate with FIMS Data Only” or “Annotate with FIMS/LIMS Data’’ functions in the Biocode Plugin.
Notes for consideration:
If assembled contigs are not correctly linked to the trace files from which they were derived, this must be remedied before FIMS/LIMS annotation can be done. Follow the Re-link Trace Files to Assembled Contigs protocol to re-link trace files to contigs.
When contigs and their trace files of origin are correctly linked, annotating contig documents will apply the new information to the trace files.
Annotating consensus sequence(s) does not apply the new information to the local contig(s) or trace files used to generate the contig(s)
If attempting to annotate a large number of documents, there is a possibility that the Biocode Plugin will crash. If this happens, select a smaller subset of the documents and try again.
Sometimes if annotation functions are not working, simply logging out and back into the Biocode Plugin will help.
Begin by following the Connecting with the Biocode Plugin page to log onto the Biocode Plugin.
Determine whether just FIMS or both FIMS and LIMS data needs to be updated for desired documents and follow the appropriate set of instructions below.
Annotate with FIMS Data Only
Use this option if contigs or consensus sequences are still properly linked to original LIMS plates (and no updates have occurred to LIMS data) but the associated FIMS data has been updated and needs to be applied to the contigs or consensus sequences.
Highlight documents to be annotated.
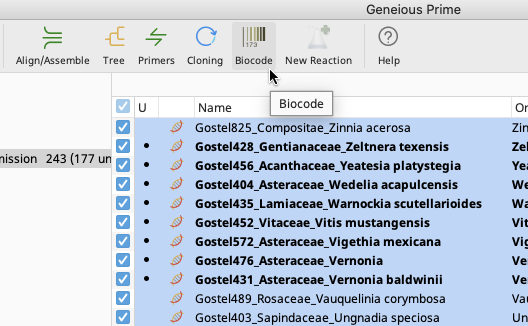
Navigate to the Biocode Plugin dropdown menu in the Geneious Prime Toolbar.
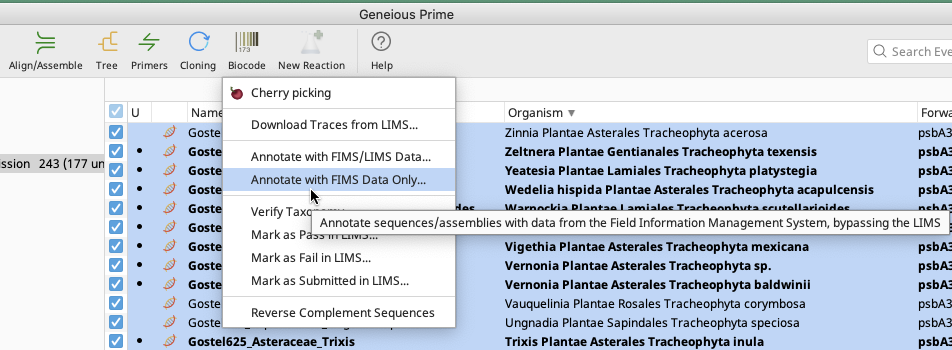
In the Biocode Plugin dropdown menu, select “Annotate with FIMS Data Only”.
An Annotate with FIMS Data Only window will pop up with three options for how to connect the local documents to the FIMS database. As per best practice, only the first two options will be described in detail below.
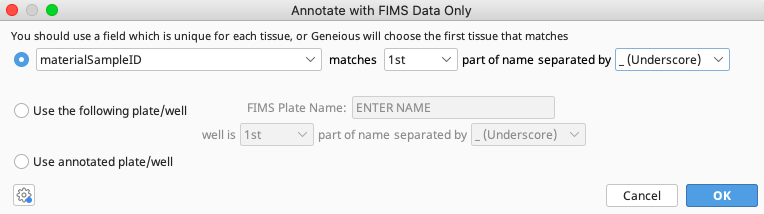
Annotating with FIMS Data Only: Option 1: Annotating by materialSampleID
Note
It is recommended that this first option be tried before the second option, as it allows documents from multiple plates to be annotated at the same time.
When using this option, the materialSampleID data must be part of the document name.
Follow the Using the Batch Rename Function instructions to add this information to the document names. For contigs, if materialSampleID was used in De Novo Assembly to create the contigs to be annotated, it will automatically be part of the contig name - despite this, use the Batch Rename function to rename the documents to ensure it is correctly linked.
Indicate where in the document name materialSampleID is found and how portions of the document name are separated. In the example above, the materialSampleID is found in the first part of the contig name and separated by “_(Underscore)”.
Click “OK” and Geneious Prime will perform the Annotate with FIMS Data Only function on the selected documents.
If the function is successful, updated FIMS data (such as taxonomy) should now be associated with the selected contig or sequence files.
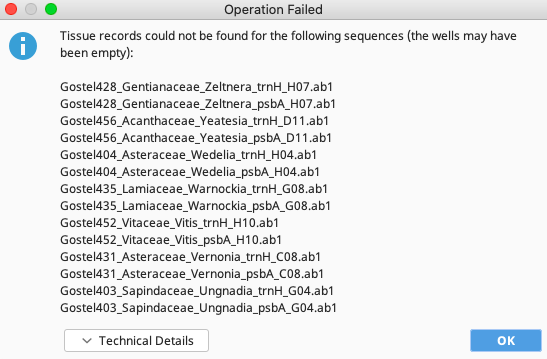
If the function is not successful (which can happen for a variety of reasons), an Operation Failed window such as the one below will pop up and the second option in the Annotate with FIMS Data Only window should be tried, as described below.
Annotating with FIMS Data Only: Option 2: Annotating with tissuePlate and tissueWell
This option is more time consuming as it requires organizing documents by FIMS data field “tissuePlate’’ and only one plate can be annotated at a time.
If using this option on consensus sequences: The tissueWell data must be part of the document names. If it is not, follow the Using the Batch Rename Function instructions to add this information to the document names.
If using this option on contig files: The tissueWell data must be part of the trace file of origin document names.
Once all documents have the tissueWell in their name, highlight documents to be annotated that belong to a single plate only.
Navigate back to the Annotate with FIMS data Only window in the Biocode Plugin dropdown menu.
Choose the second option “Use the following plate/well”.
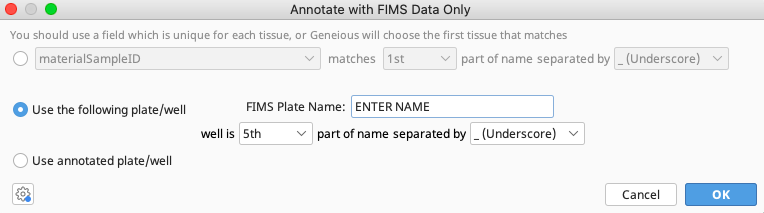
Enter the name of the FIMS tissuePlate.
Select where in the document (consensus sequence or trace file) name tissueWell will be found and how portions of the document name are separated. In this example, the tissueWell is in the 5th part of the name separated by “_(Underscore)”.
Click “OK” and Geneious Prime will perform the “Annotate with FIMS Data Only” function on the selected documents.
If the function is successful, updated FIMS data (such as taxonomy) should now be associated with the selected contig or sequence files.
Annotate with FIMS/LIMS Data
This option should be used when contigs or consensus sequences need to be re-linked to original LIMS plate or workflows, or if updates have occurred in both the GEOME FIMS and Biocode LIMS (e.g. updated primer names).
Highlight all documents to be annotated.
Navigate to the Biocode Plugin dropdown menu in the Geneious Prime Toolbar.
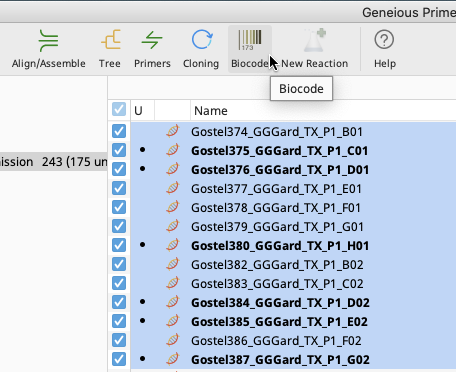
In the Biocode Plugin dropdown menu, select “Annotate with FIMS/LIMS Data”.

An Annotate with FIMS/LIMS Data window will appear with two options for how to connect the local documents to the LIMS database.
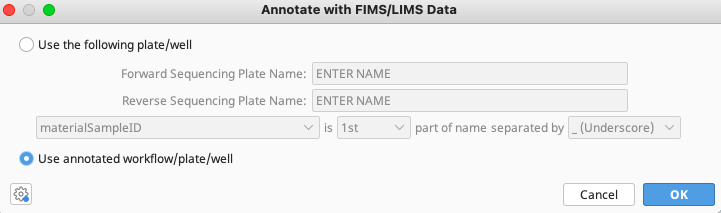
Annotate with FIMS/LIMS Data: Option 1: Annotating by WorkflowID
Note
It is recommended that this first option be tried before the second option, as it allows documents from multiple plates to be annotated at the same time.
Choose “Use annotated workflow/plate/well”.
Click “OK” and Geneious Prime will perform the “Annotate with FIMS/LIMS Data” function on the selected documents.
If the function is successful, updated FIMS and LIMS data (such as taxonomy, primers, LIMS workflows) should now be associated with the selected contig or sequence files.
Annotate with FIMS/LIMS Data: Option 2: Annotating with Cycle Sequencing Plate/materialSampleID
This option is more time consuming as it requires organizing documents by FIMS data field “tissuePlate’’ and only one plate can be annotated at a time.
Highlight documents to be annotated that belong to a single plate only.
If documents highlighted are consensus sequences, it may be necessary to set the read direction of the sequence in order to annotate with this function. If this is the case, see the Setting Read Direction instructions below.
If using this option on consensus sequences: The materialSampleID data must be part of the document names. If it is not, follow the Using the Batch Rename Function instructions to add this information to the document names.
If using this option on contig files: The materialSamplelD data must be part of the trace file of origin document names.
Once documents to be annotated have materialSampleID in their name, navigate back to the Annotate with FIMS/LIMS Data window in the Biocode Plugin dropdown menu.
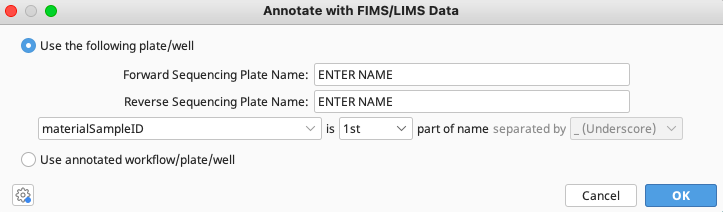
Choose “Use the following plate/well’.
Enter the exact name of both the Forward and Reverse Sequencing Plate Names from the LIMS database from which trace files were obtained.
Select materialSampleID as the pivot data field to reconnect the local documents with the LIMS. Select where in the document (consensus sequence or trace file) name materialSampleID will be found and how portions of the document name are separated.
Click “OK” and Geneious Prime will perform the “Annotate with FIMS/LIMS Data” function on the selected documents.
If the function is successful, updated FIMS and LIMS data (such as taxonomy, primers, LIMS workflows) should now be associated with the selected contig or sequence files.
Re-link Trace Files to Assembled Contigs
For various reasons, trace files can become unlinked from the contig file in Geneious Prime, and this may prevent the “Annotate with FIMS/LIMS Data’’ function from working.
If a trace file is no longer linked to a contig file, the reference icon to the left of the trace file name in the contig Document Viewer Contig View tab will be missing.
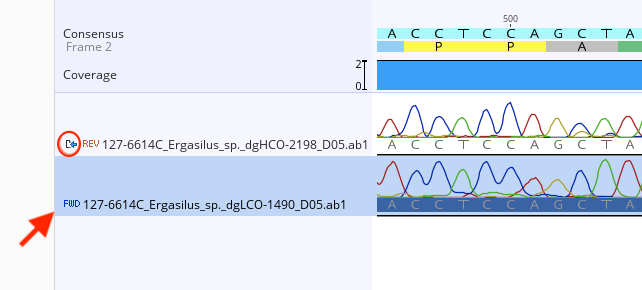
To re-link the trace files to the contig, the “Extract” function will need to be performed.
Highlight the unlinked trace file in the contig Document Viewer, Contig View tab.
Select “extract” from the options at the top of the Contig View tab.
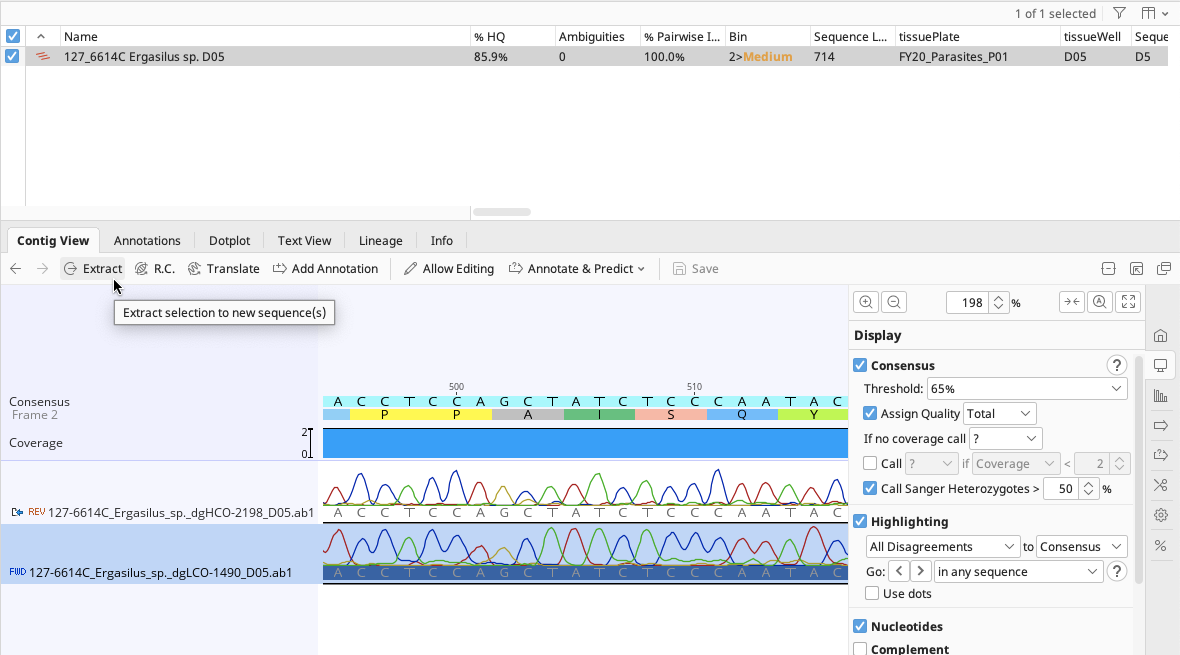
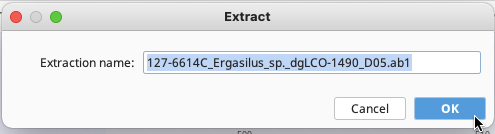
An Extract window will pop up with the previous trace name automatically filled in for the Extraction name. Click “OK”.
In the same local Geneious directory, a new trace file is produced and linked to the contig, as seen in the Document Viewer, Contig View. Both traces should now have the reference icon.

Note
If the extracted trace was the reverse read, the extracted trace will need to be reverse complemented to have the same orientation as the original trace file.
The new trace file can be dragged and dropped to wherever the original unlinked trace was. The ”Annotate with FIMS/LIMS Data” function should now work on this contig.
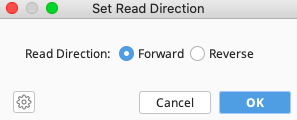
Setting Read Direction
To set read direction on a consensus sequence, highlight the document(s) in question.
Navigate to the Sequence dropdown in the Geneious Prime Menu Bar. Click on “Set Read Direction”.
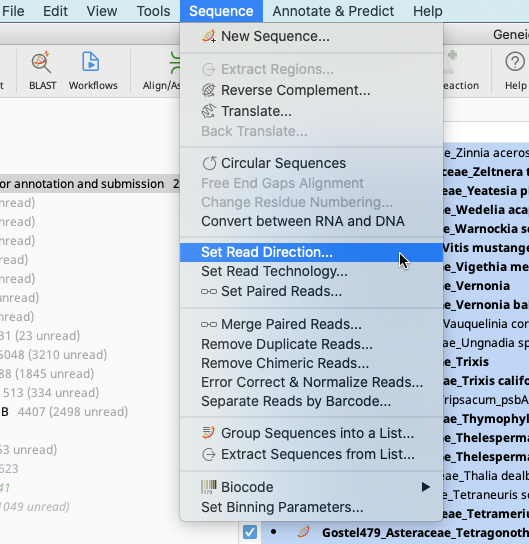
Indicate that the consensus sequences are forward direction (assuming there are no reverse complement sequences). Click “OK”.
Consensus sequences should now have a set read direction.